Initial configuration for Windows
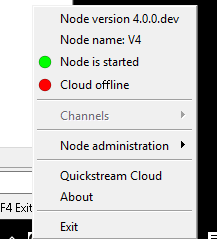
Quickstream Node initial configuration should be done using a tool called Quickstream Node Setup. It is a special GUI application that is located in a windows tray.
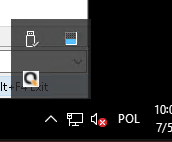
If the quickstream icon is not present in the windows tray it means it is not running. Make sure Quickstream Node is properly installed. You can run Quickstream Node setup manually by running C:\Program Files\Quickstream\Quickstream Node\bin\qs-node-setup.exe
There are two ways to manage Quickstream Node. You can manage it by using Quickstream Cloud or Quickstream Client. Follow the instructions below to connect Quickstream Node to Quickstream Cloud or enable local management using Quickstream Client.
Connecting/Disconnecting Quickstream to Quickstream Cloud
To connect Quickstream Node to Quickstream Cloud you need to have an active account in Quickstream Cloud. If you do not have one please go to Quickstream Cloud and create it.
Connecting to Quickstream Cloud using Quickstream Node Setup is very simple! Open Quickstream Node Setup, go to Node administration,Cloud management and select Enable Cloud management.
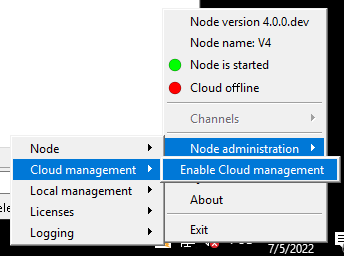
Now provide your username/password used in Quickstream Cloud account and enter Quickstream Node name. The User who connects Quickstream Node to Quickstream Cloud is an owner of this Node. Please use the root account of your organization to prevent unprivileged users to access your Node.
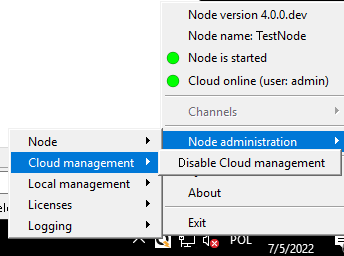
Disconnecting Quickstream Node from Cloud is also very simple. Open Quickstream Node Setup application, go to Node administration,Cloud management, and select Disable Cloud management. Then follow the instructions on your screen.
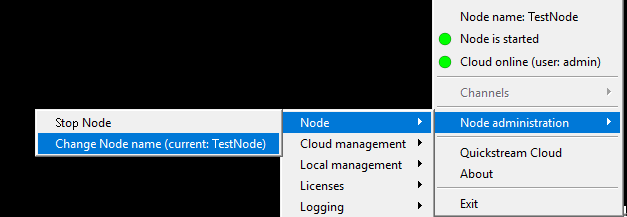
Changing Quickstream Node name
If you connected Node to the Cloud you can still change its name by opening Quickstream Node Setup, right-clicking on the Quickstream icon, opening Node administration, then Node and Change Node name option. Next enter the new Node name.
Enabling Quickstream Client access
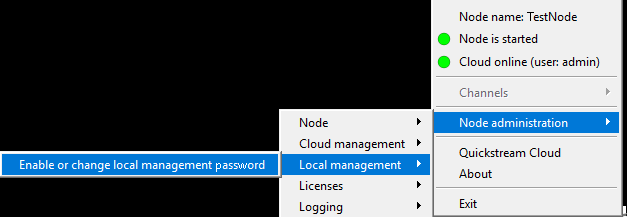
By default Quickstream Node local management access is disabled. If you want to use Quickstream Client to manage your node using a direct ip connection open Quickstream Node Setup, go to Node administration, Local management, and click on Enable or change local management password. Enter your local password that will be used in Quickstream Client application.
If you lost your current local password you will need to contact with support.
Changing Quickstream Client access password
To change your local password, open Quickstream Node Setup, go to Node administration,Local management and click on Enable or change local management password. Your old password is required to set a new one.
If you lost your current local password you will need to contact with support.
Logging and more advanced configuration
Logging is documented at: Logging.
Advanced configuration is documented at: Advanced configuration.
Next steps
If you performed an initial configuration go to Quickstream Cloud or Quickstream Client to fully manage your Node.