Initial configuration
Windows
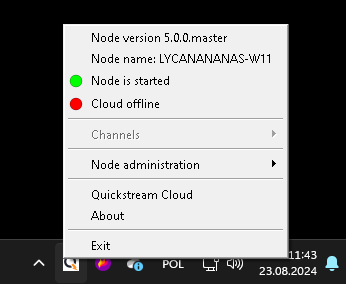
Quickstream Node initial configuration should be done using a Quickstream Node Setup tool. It is a small GUI application located in a Windows tray.
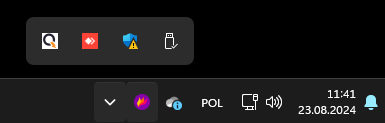
If the Quickstream icon is not in the Windows tray, it is most likely not running. Make sure Quickstream Node is correctly installed. You can run Quickstream Node setup manually by running C:\Program Files\Quickstream\Quickstream5\bin\quickstream5-setup.exe
There are two ways to manage Quickstream Node. You can manage it by using Quickstream Cloud. Please follow this page to connect your Quickstream Node to Quickstream Cloud. Alternatively, you can manage directly from Quickstream Node from local management interface.
Connecting/Disconnecting Quickstream to Quickstream Cloud
To connect Quickstream Node to Quickstream Cloud you need to have an active account in Quickstream Cloud. If you do not have one please go to Quickstream Cloud registration page and create it.
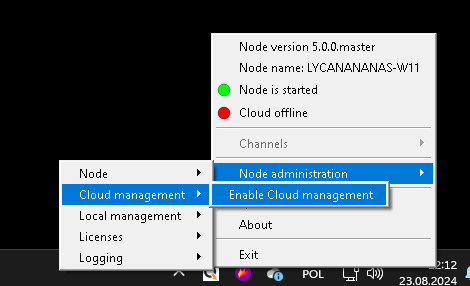
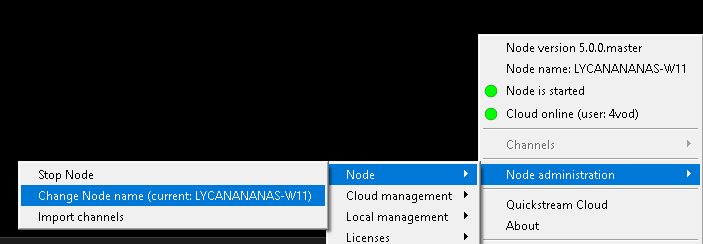
Connecting to Quickstream Cloud using Quickstream Node Setup is very simple! Open Quickstream Node Setup, go to Node administration,Cloud management and select Enable Cloud management.
Now provide your username/password used in Quickstream Cloud account and enter Quickstream Node name. The user who connects Quickstream Node to Quickstream Cloud has all permissions to manage this Node and it is called an Owner. Please use the root account of your organization to prevent unprivileged users from accessing your Node.
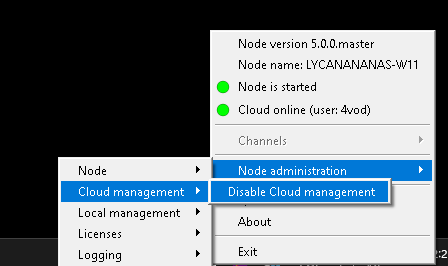
Disconnecting Quickstream Node from Cloud is also very simple. Open the Quickstream Node Setup application, go to Node administration,Cloud management, and select Disable Cloud management. Then, follow the instructions on your screen.
Changing Quickstream Node name
If you connected Node to the Cloud, you can still change its name by opening Quickstream Node Setup, right-clicking on the Quickstream icon, opening Node administration, then Node and Change Node name option. Next, enter the new Node name.
Importing channels
This option imports channels from Quickstream Node 3 or 4 to Quickstream Node 5.
Logging and more advanced configuration
For more advanced configuration please refer to this section of the documentation.
Local management
You can manage Quickstream Node with a cloud connection. Please go to local web management interface section for more information.
Next steps
If you performed an initial configuration go to Quickstream Cloud or local web management interface.
Linux
In the linux terminal execute quickstream-node-setup command. This command starts a simple CLI application built to configure Quickstream Node.
You should see the following output:
using config file: "/opt/quickstream5/etc/quickstream5.ini"
Started quickstream node setup tool.
Config folder: /opt/quickstream5/etc
Trying to connect to node at localhost port: 32123
If you want to use different port for all node connections:
- stop service,
- edit /opt/quickstream5/etc/quickstream5.ini
- restart service

Connection to Node established, logging in.

Log level changed to: Verbose

Menu:

1) Enable Cloud management (currently: disabled)
2) Disable Cloud management
3) Enable or change local management password
4) Change Node name (current: 'LYCANANANAS-PC')
5) Print Hardware ID
6) Update licenses
7) Change log level (current: Verbose)
8) Show path of folder with log files
9) Export activity log to file
10) Update local management tool if available
11) Change access level to local management tool (current: disabled)
12) Try to import DIRECT channels from old version of quickstream
    (cannot automatically import Transcoding configurations)
0) Quit setup
To perform an initial configuration please:
- Select option 1 to enable cloud management using Quickstream Cloud (recommended) and follow instructions below.
- Select option 3 to enable local management using local web management interface
The rest of the configuration is done using Quickstream Client application or Quickstream Cloud management portal.
Enable Cloud management
Quickstream Cloud is the easiest way to manage your Quickstream Nodes. It allows to remotely configure multiple Nodes from any location. It runs in your web browser and does not require any additional applications. It is a recommended way to manage your Nodes. Find out more about Quickstream Cloud.
To connect Quickstream Node to Quickstream Cloud you need to have an active account in Quickstream Cloud. If you do not have one please go to Quickstream Cloud and create it.
Press 1 to Enable Cloud management. Setup will ask you for your username and password to Quickstream Cloud.
User which connects Node to Cloud is an Owner of this Node and is the only user that can Disable Cloud management and remove Node from cloud management. Please use root account of your organization to prevent unprivileged users to access your Node.
Disable Cloud management
To disconnect Node from Quickstream Cloud press 2. If you do not have access to Node and you want to disconnect it from Cloud just login to your cloud account at Quickstream Cloud you can still do it using Quickstream Client application.
Shared Node
Once you connect Node to Cloud you can give management access to your Node to other Quicksteam Cloud users. Remember to remove access to Node for other users before disconnecting Node from Cloud.
Enable or change local management password
Management of Quickstream Node is also possible without Quickstream Cloud. You can use local web management interface application and connect to Quickstream Node directly.
By default Quickstream Node local access is disabled. Press 3 to enable access and set a local password to your Node.
If you lost your current local password you will need to contact with support.
Change Node name
Every Quickstream Node has its name. By default it is the same as hostname. If you select option 4 you will be asked for a new name for your Node. Node name may be also changed in Quickstream Cloud and Quickstream Client application.
Change log level
This option allows you to change the log level. Please refer to Logs section of this documentation.
Show path of folder with logs
Show path where logs are located.
Export activity log to file
Exports activity log to a file.
Update local management tool if available
Downloads newest Quickstream Client to Node so you can manage it using web browser.
Change access level to local management tool
It enables or disables local Quickstream Client which is a local hosted web app.
Import channels from old Quickstream version
It imports channels from Quickstream Node 3 or 4 to Quickstream Node 5.
Next steps
If you performed an initial configuration go to Quickstream Cloud or Quickstream local management interface to manage your Node.